Creating a character for games in Godot using MakeHuman
An expanded and expanded edition of the MH into Godot tutorial (part 2)
In 3 volumes.
This is not really a tutorial, but more of a developer's diary type of thing.
It is intended for game developers and is supposed to be published on the Godot site. I will be grateful for comments, suggestions and other constructive criticism.
Volume 1. MakeHuman
Volume 2. Blender
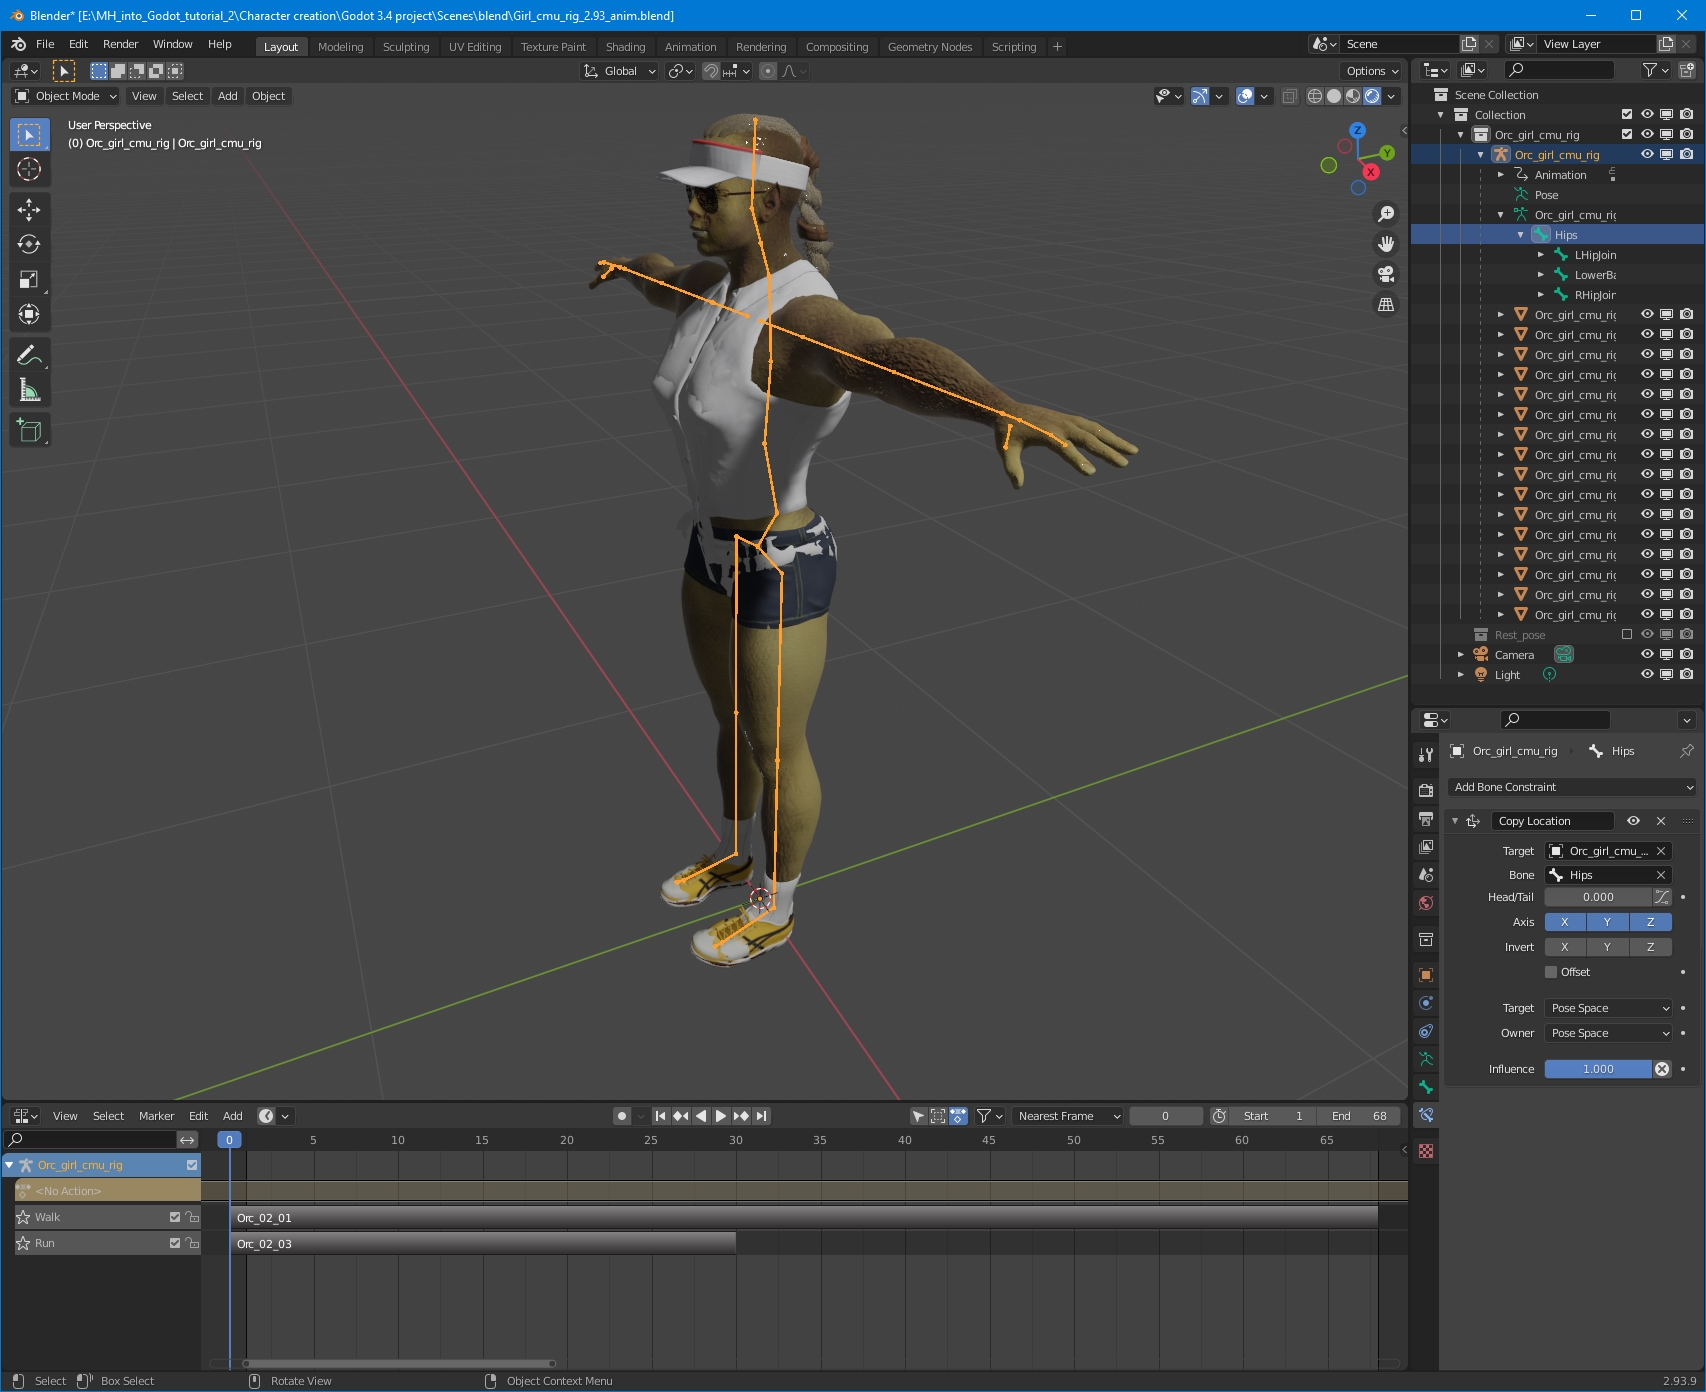
Exporting to Blender.
Assigning Animations.
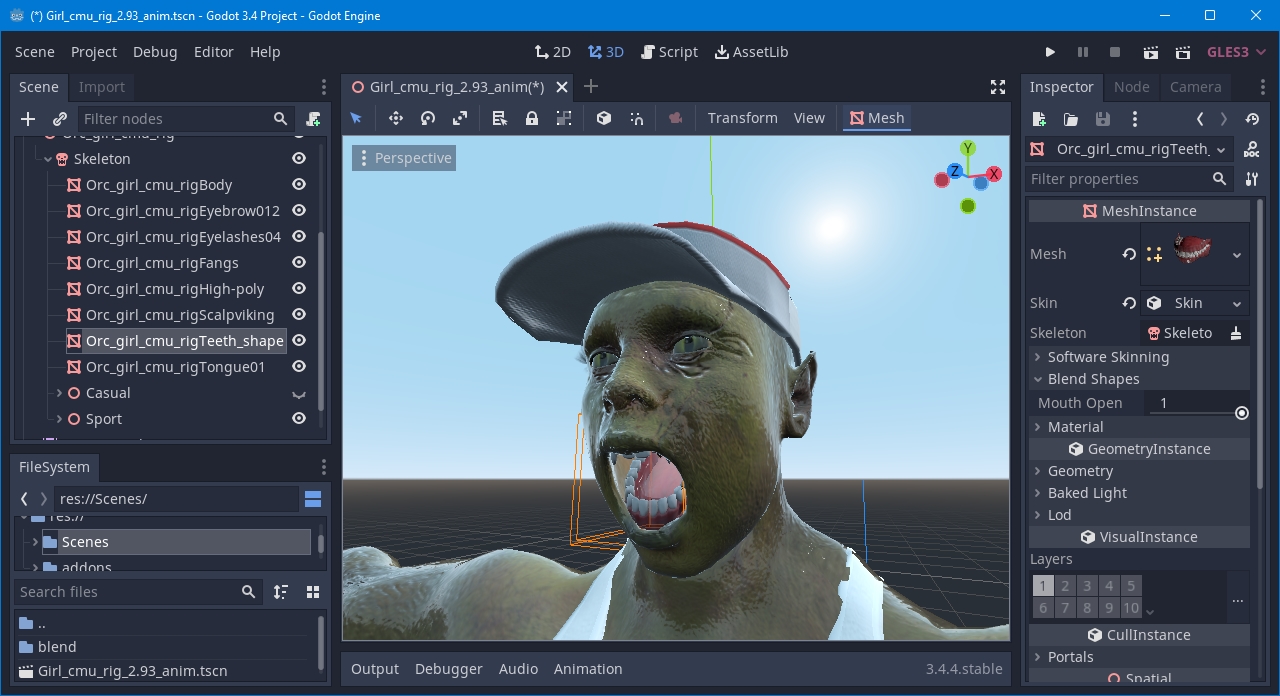
Importing into Godot.
Volume 3. Conclusion
Challenges and perspectives.
Volume 1
Creating a character in MakeHuman
Creating a character for the game with a change of clothes and several animations.
Introduction. MakeHuman Overview
FAQ:What is MakeHuman?
MakeHuman is a completely free, innovative and professional software for the modelling of 3-Dimensional humanoid characters.
Documentation:What is MakeHuman?
MakeHuman is an open source (AGPL3) tool designed to simplify the creation of virtual humans using a Graphical User Interface, also commonly referred to as a GUI.
…
Humans are created through the manipulation of controls that allow for the blending of different human attributes to create unique 3D human characters. The controls are intended to provide the user with a simple way to create characters that give expression to the widest possible range of human forms.
…
The MakeHuman project strives to provide a complete tool that allows for the management of all things needed to create realistic virtual humans.
Distinguished by a large number of settings and easily expandable features. There is a plugin for mass character creation "Mass produce". Has a lot of ready-made clothing and accessories. You can create new ones yourself. Easy to integrate with Blender.
Has options not found in other similar programs:
Allows you to change the age of a character. It is enough to create a model and you can change the age with one parameter. Very convenient if you are making a game about growing up.
Allows you to assign different rigs to characters. Large selection of ready-made skeletons or you can make your own.
Sliders do not have the ability to enter a numerical value, which is sometimes not very convenient.
The program is mainly aimed at artists who create static images or videos. It is still little adapted for use in games, but has a lot of opportunities in this regard.
I will try to show how you can make a character with a change of clothes and assign him animation.
Programs used:
MakeHuman 1.2.0
Blender 2.93.9
Godot 3.4.4
Addons:
For Blender
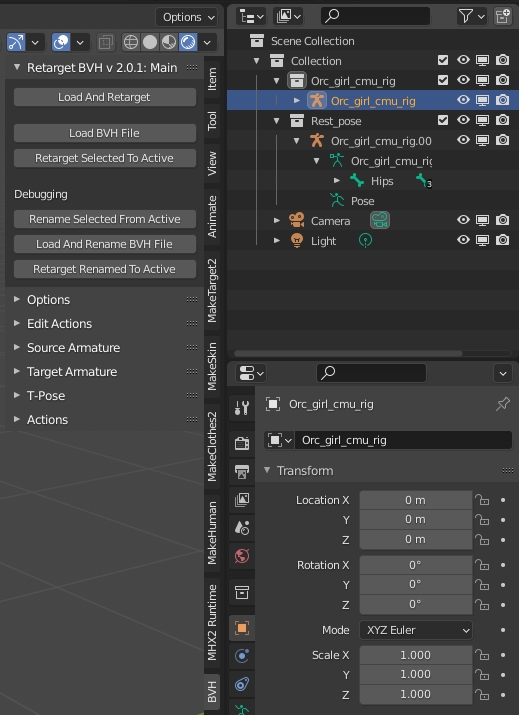
Retarget BVH
MHX2
For Godot
Blender Importer Addon for Godot
The additional viewport in the screenshots is Camera Monitor.
Step 0
Program Installation
Download the program, install it.
User data is located in the folder:
Windows
C:\Users[Name]\Documents\makehuman\v1py3\data\
Linux
??
This is where you install additional assets: clothes, hair, poses ect.
You can install them directly from the program, tab "Community". Or manually from the site — User contributed assets.
They are very well represented in the gallery, but it's a bit difficult to get there.
The following assets were used in the tutorial:
Author
Asset
punkduck
sport briefs 01
sport bra 01
sun visor (sports visor)
Short jeans (female)
Sleeveless Shirt
tennis shoes
Martial-Arts Shoes (Kill Bill)
Elvaerwyn
Ladies Sunglass1 by Elv
RehmanPolanski
Scalp Viking
callharvey3d
Fangs
sonntag78
Orkifyhead
Orkifyheadtarget custom skin
Hatshj
Alien Eyes
blindsaypatten
Fully close mouth
Joel Palmius
Elf ears
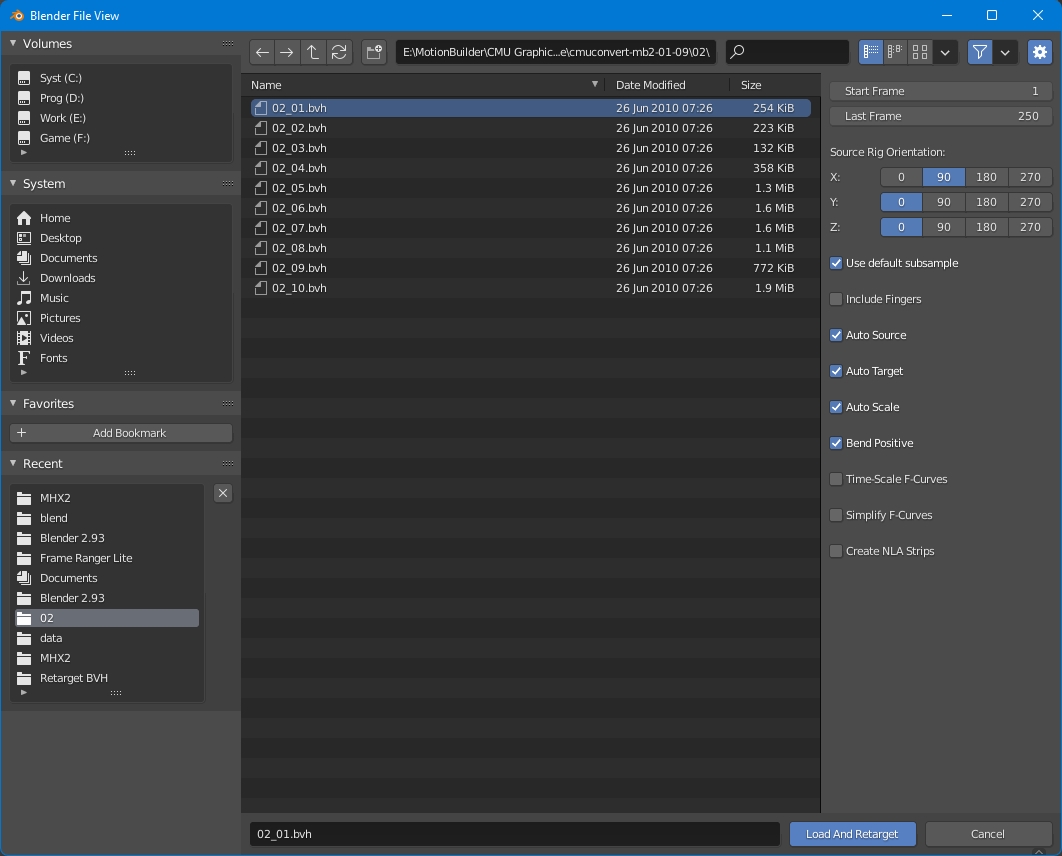
Animation used from the cgspeed
MotionBuilder-friendly version 2010 RE-RELEASE
BVH directories 01-09 (32 MB)
02_01.bvh walk
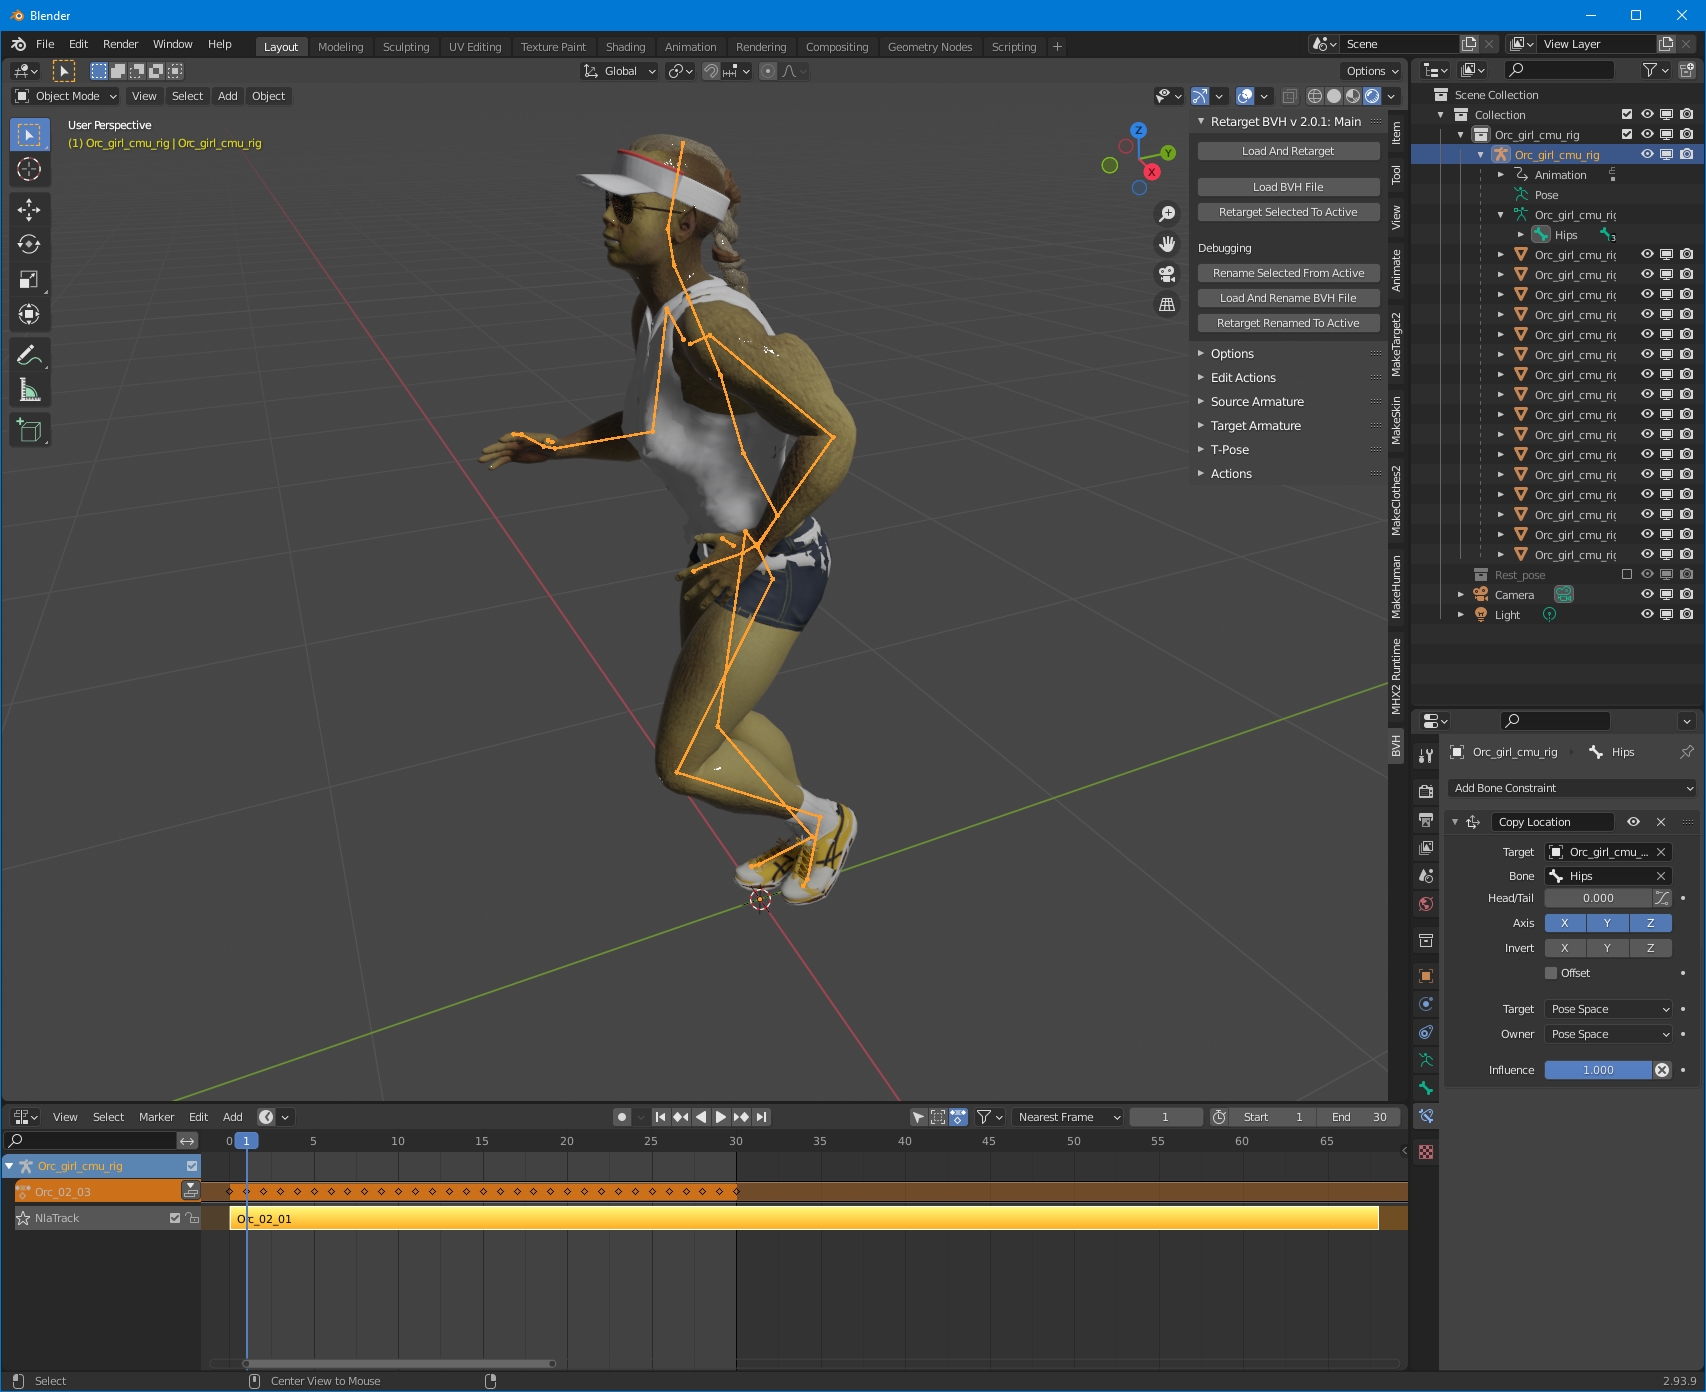
02_03.bvh run
Step 1
Modeling
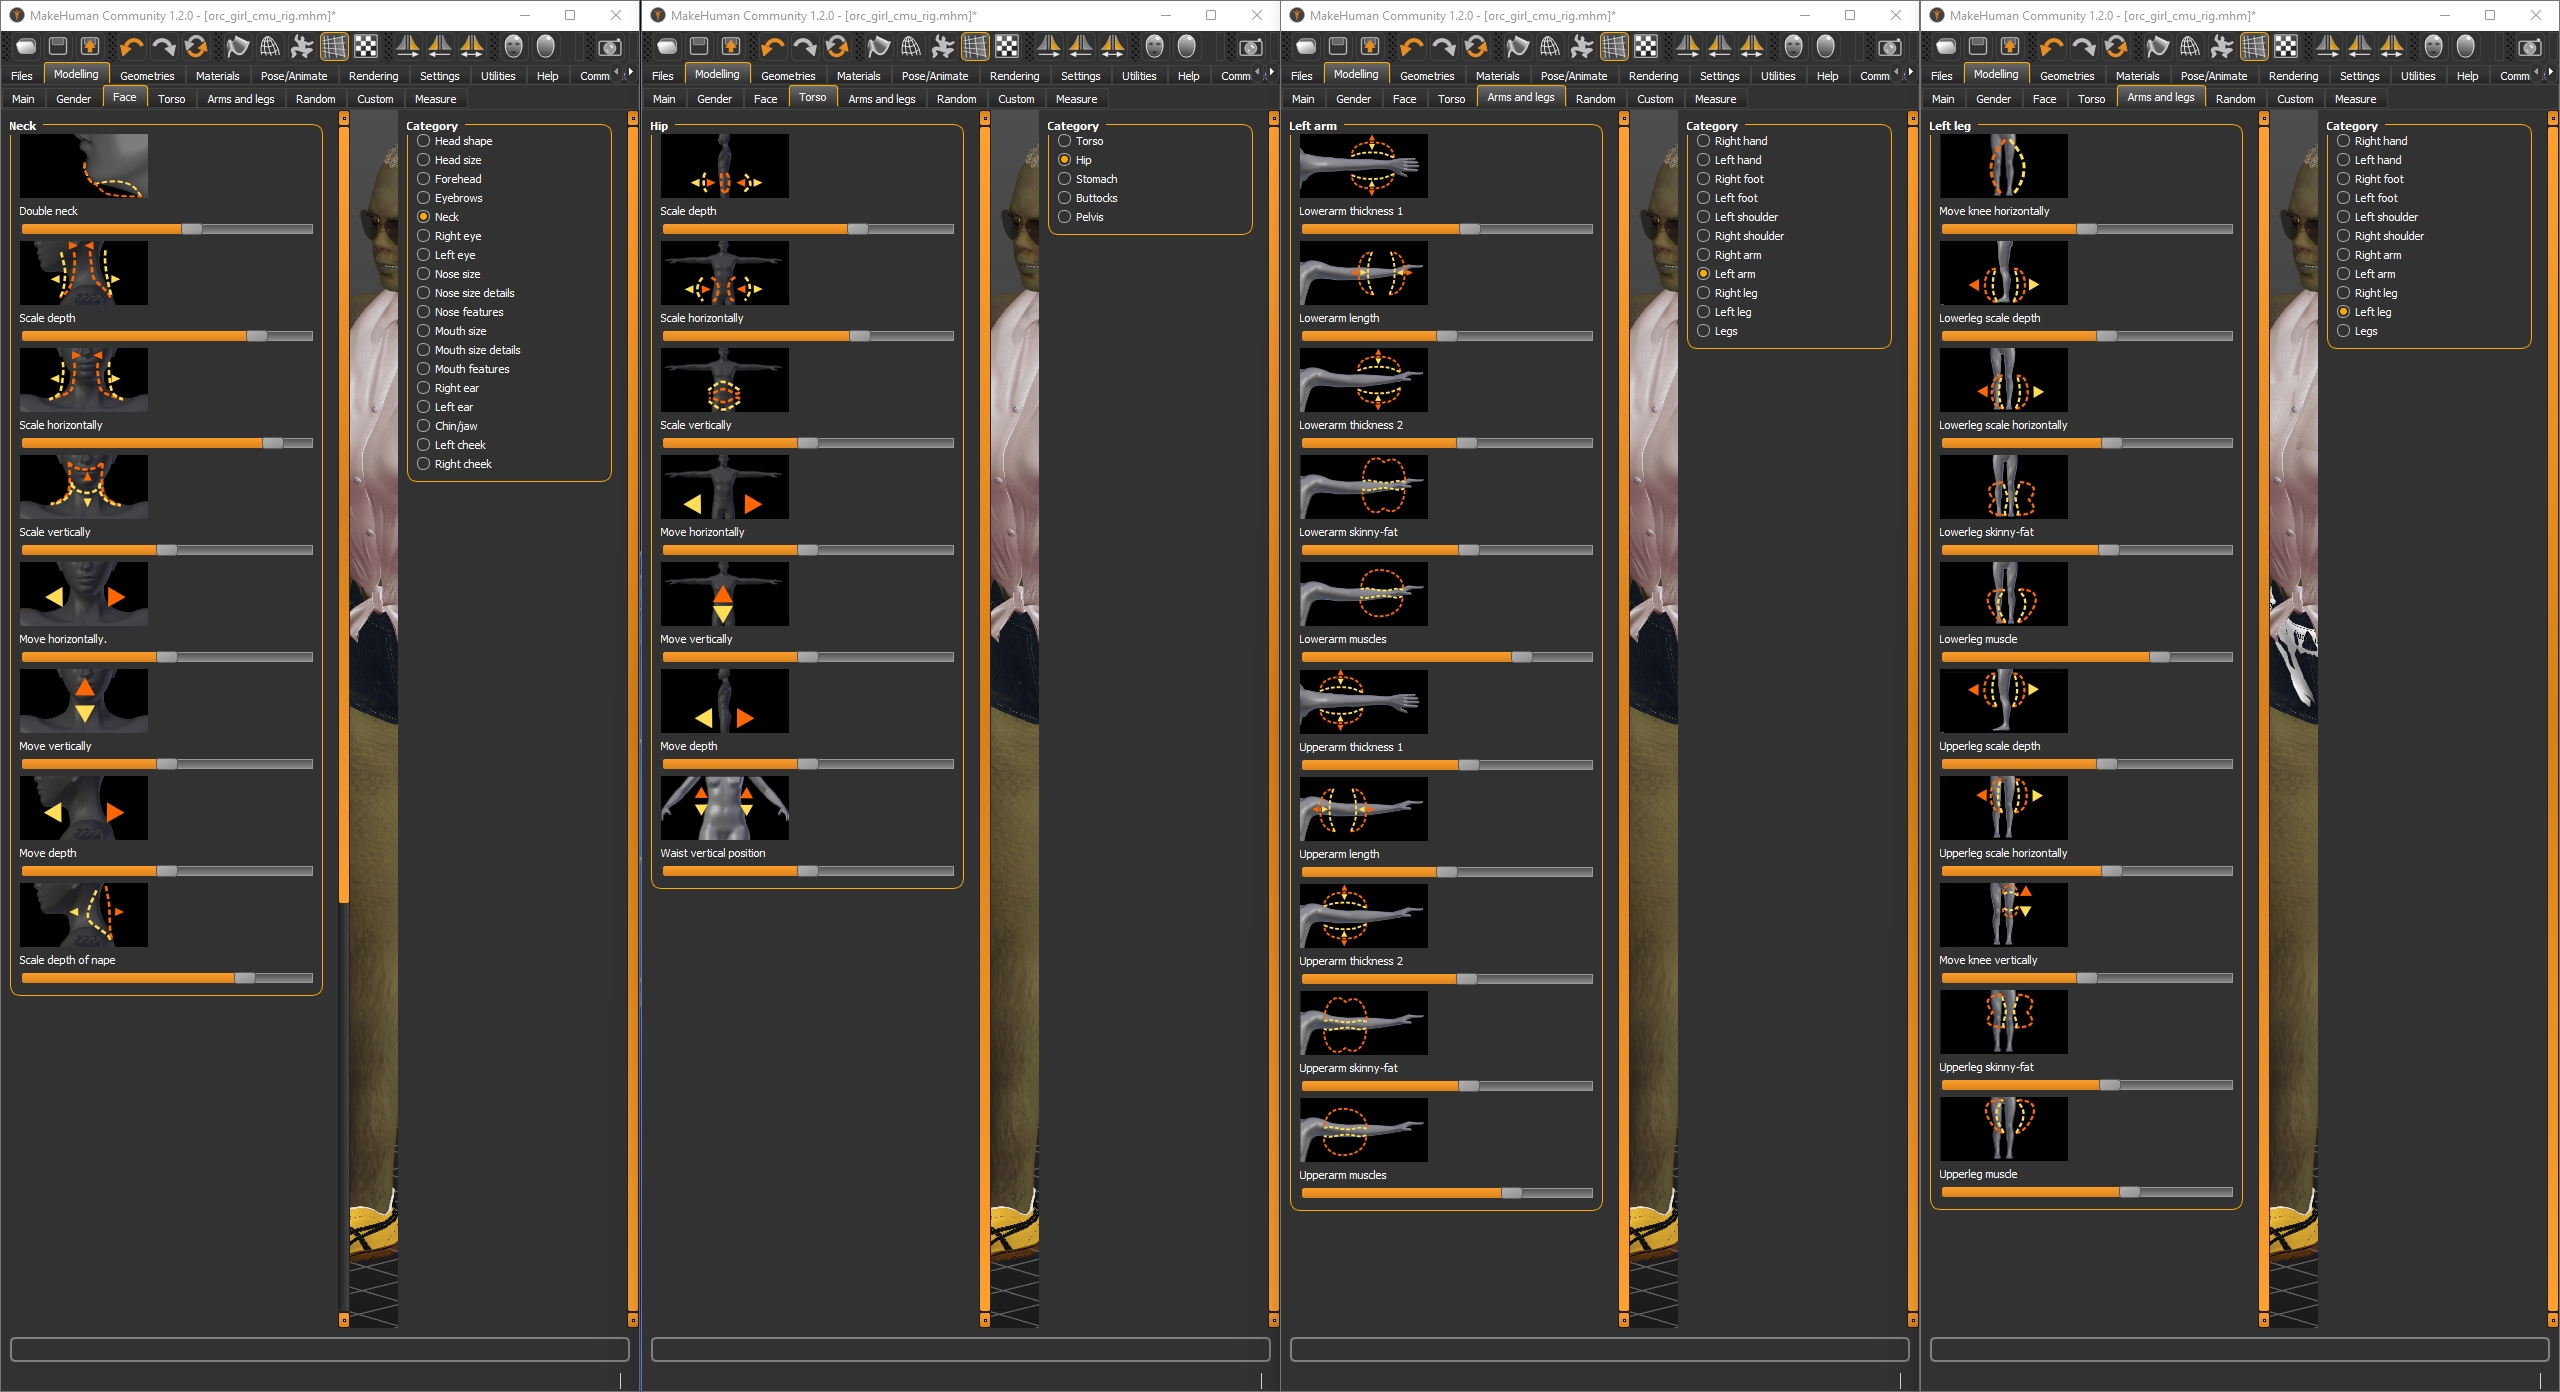
Run the program and customize the character. By default, it offers a middle-gendered and middle-aged character.
Since there are no numeric values to enter, you have to move the sliders, like this:
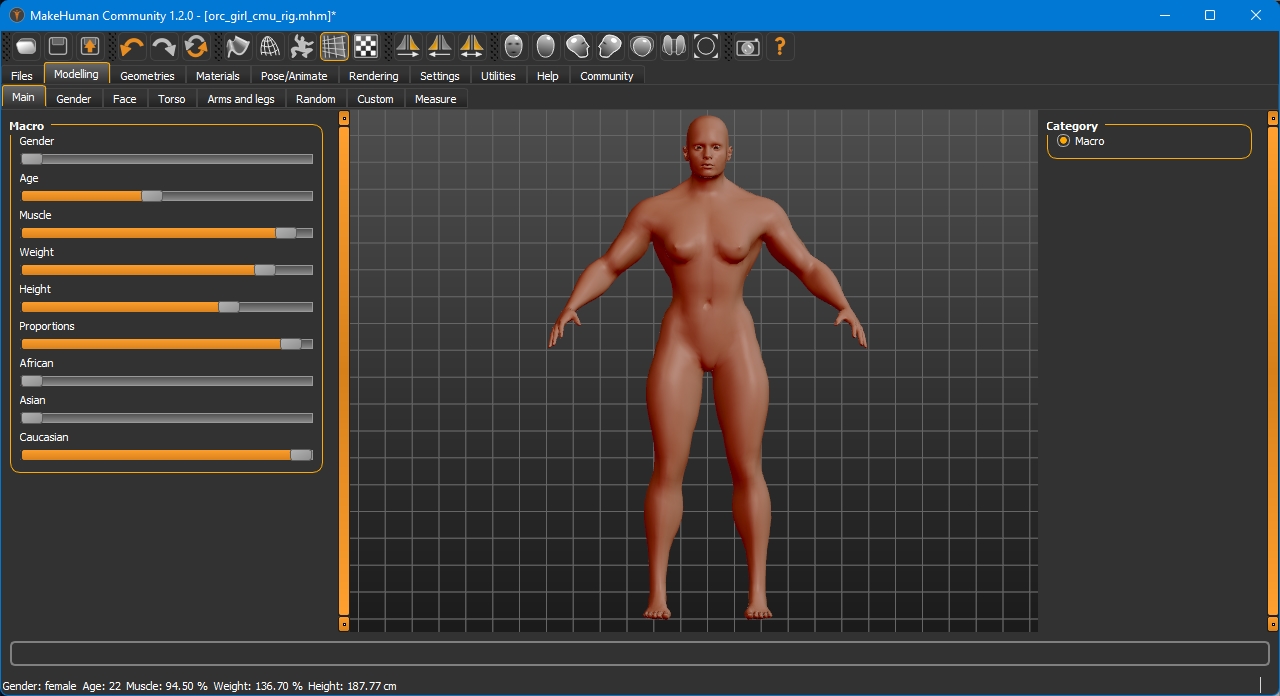
General body settings, head, torso, arms, legs...
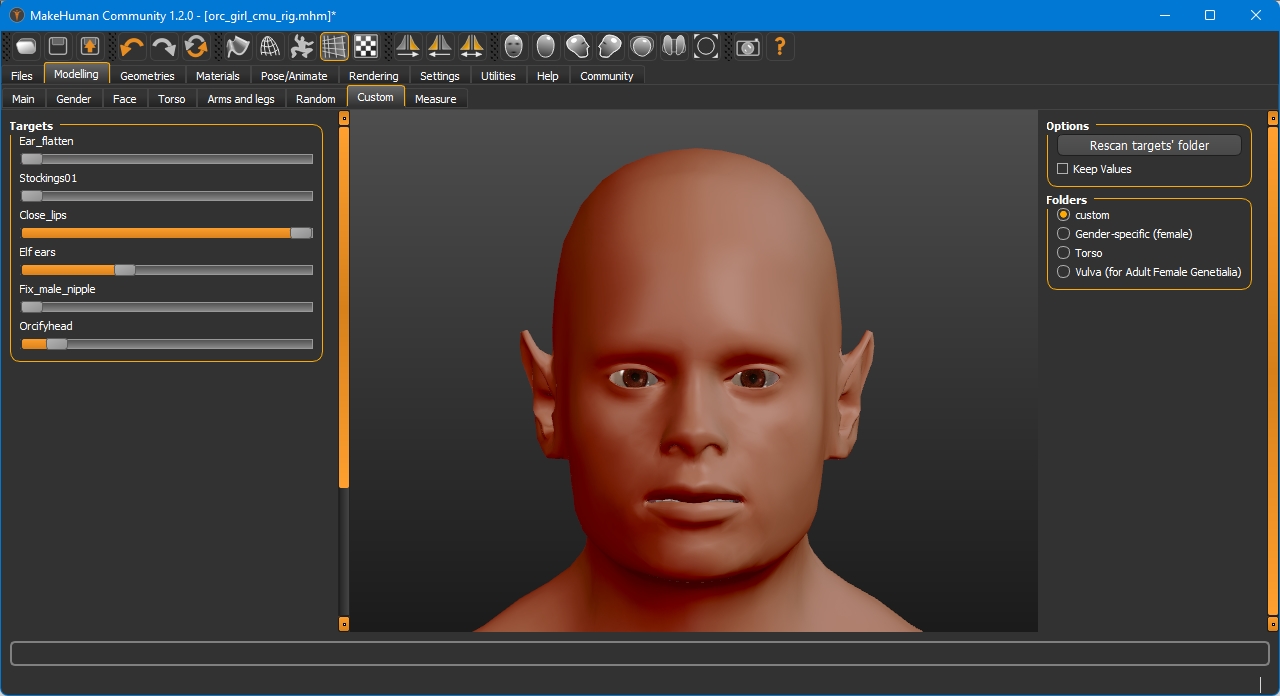
Apply the modifiers
Custom
Orkifyhead
Elf ears
Fully close mouth
Geometry
The following sequence is not important, we need to equip our character with everything necessary for life and combat: hair, teeth, tongue, eyebrows, eyelashes… if it is supposed that the character will not open his mouth, you can skip the teeth and tongue setup.
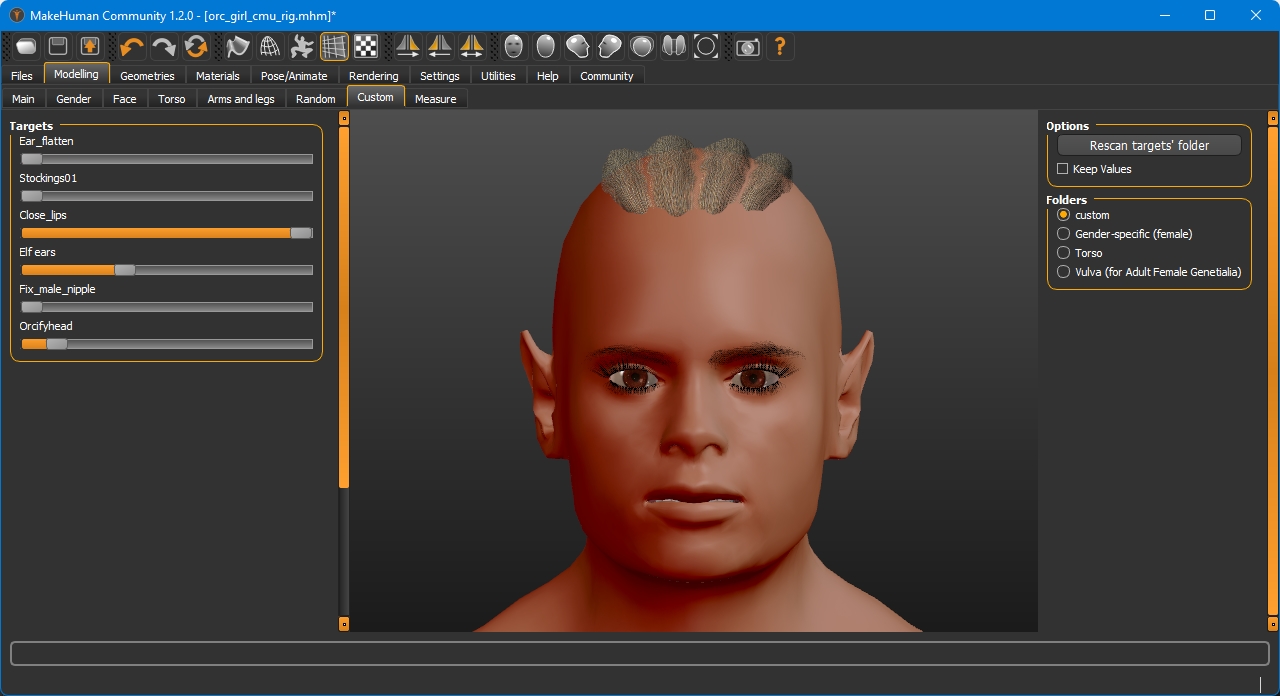
Hair
Scalp Viking
Fangs
Fangs (from the Clothes[Accessory] tab)
Making the body parts modifiable is possible, but difficult. At the end I'll tell you how.
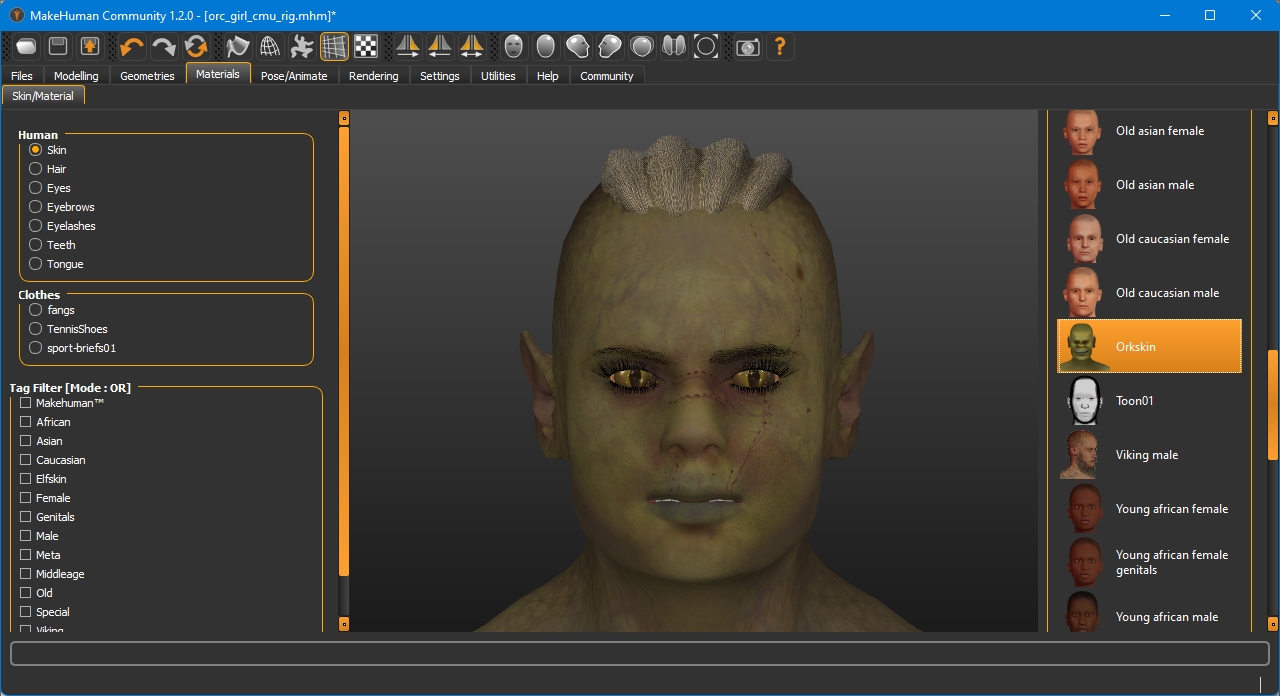
Materials
Assigning textures.
Body
Orkifyheadtarget custom skin
Eyes
Alien Eyes
Step 2
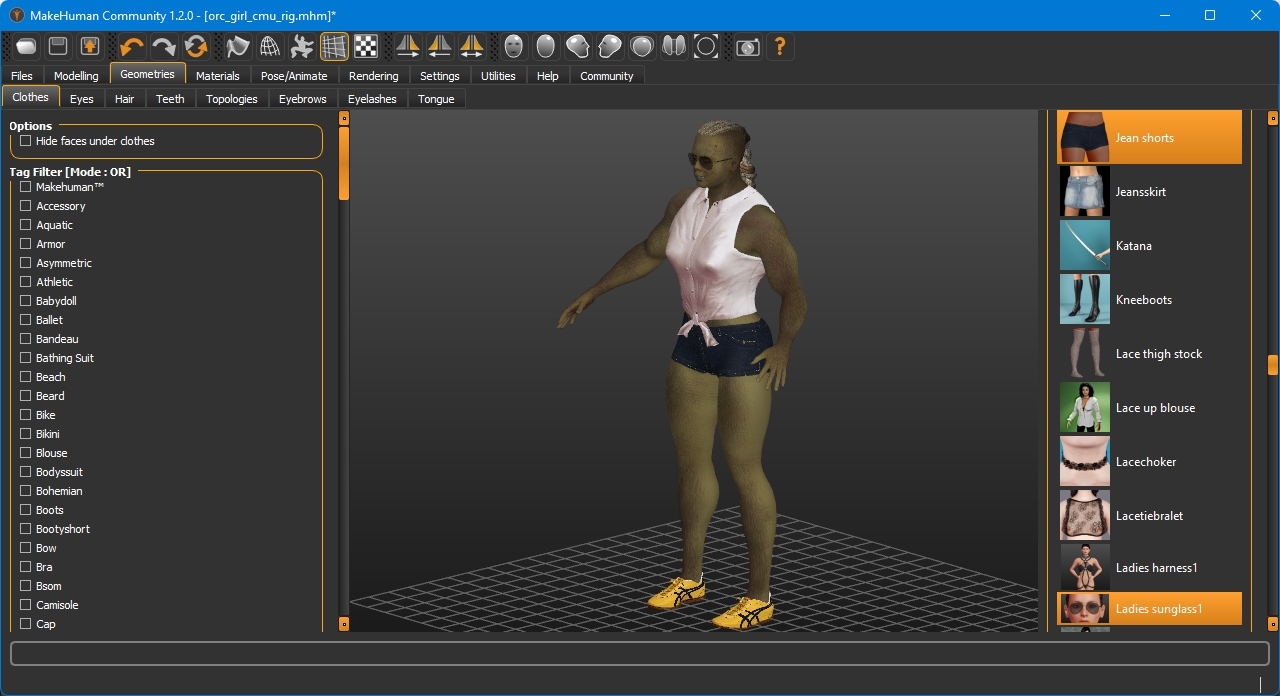
Dress up your character.
Geometry
Choose clothing
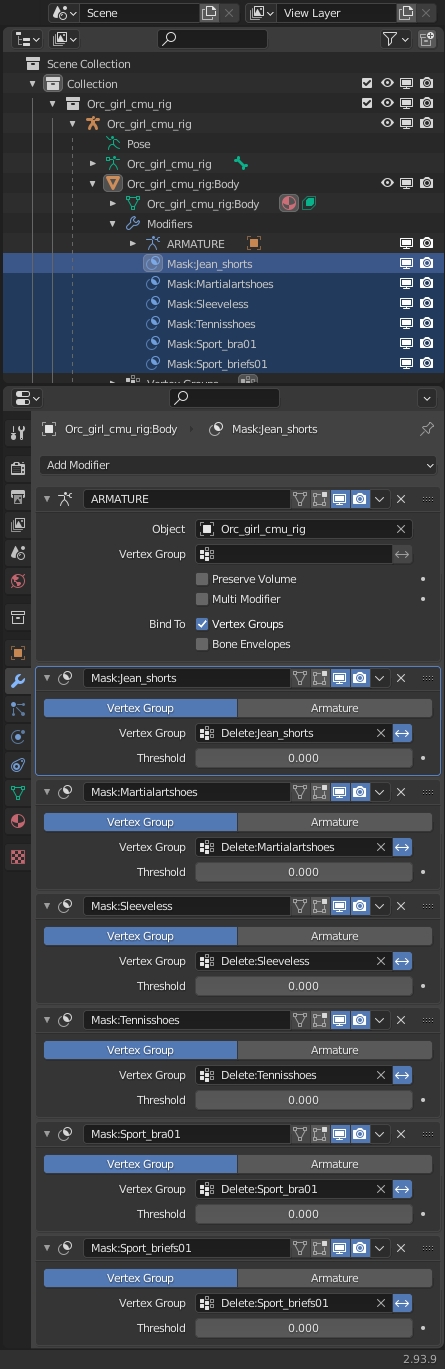
If a change of clothes is expected, then we put all the necessary clothes on the character. In this case there are 2 sets: casual and sports.
Casual
Short jeans
Sleeveless Shirt
Martial-Arts Shoes
Ladies Sunglass
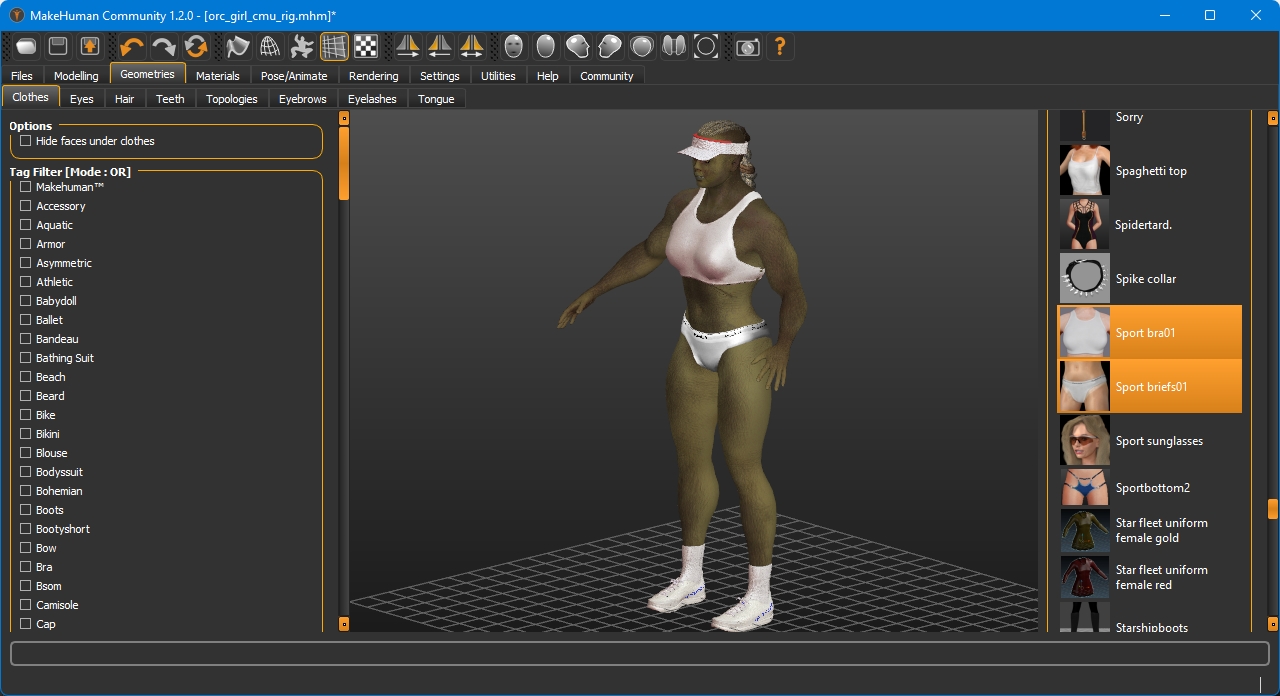
Sporty
port briefs 01
sport bra 01
sun visor (sports visor)
tennis shoes
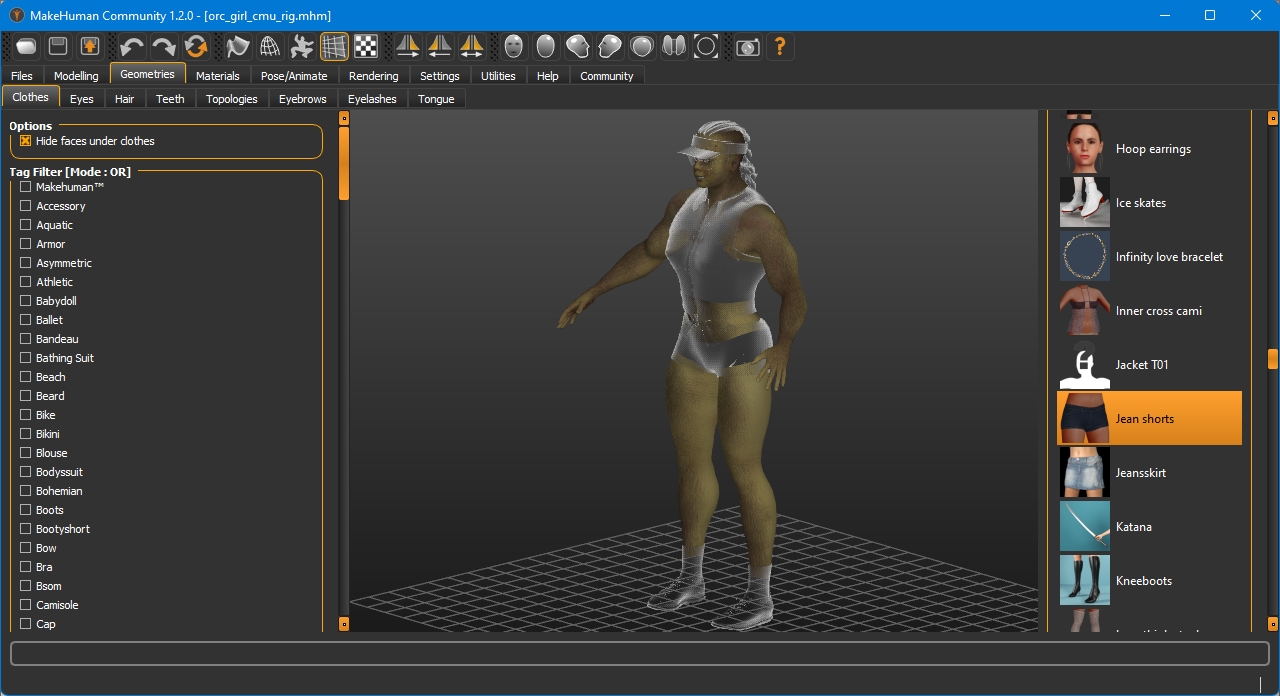
The option "Hide face under clothing"
If you don't intend to change clothes, it's better to leave this option. If this option is disabled, then it will be visible when the body goes beyond the clothes. When exporting, this function will be enabled in any case.
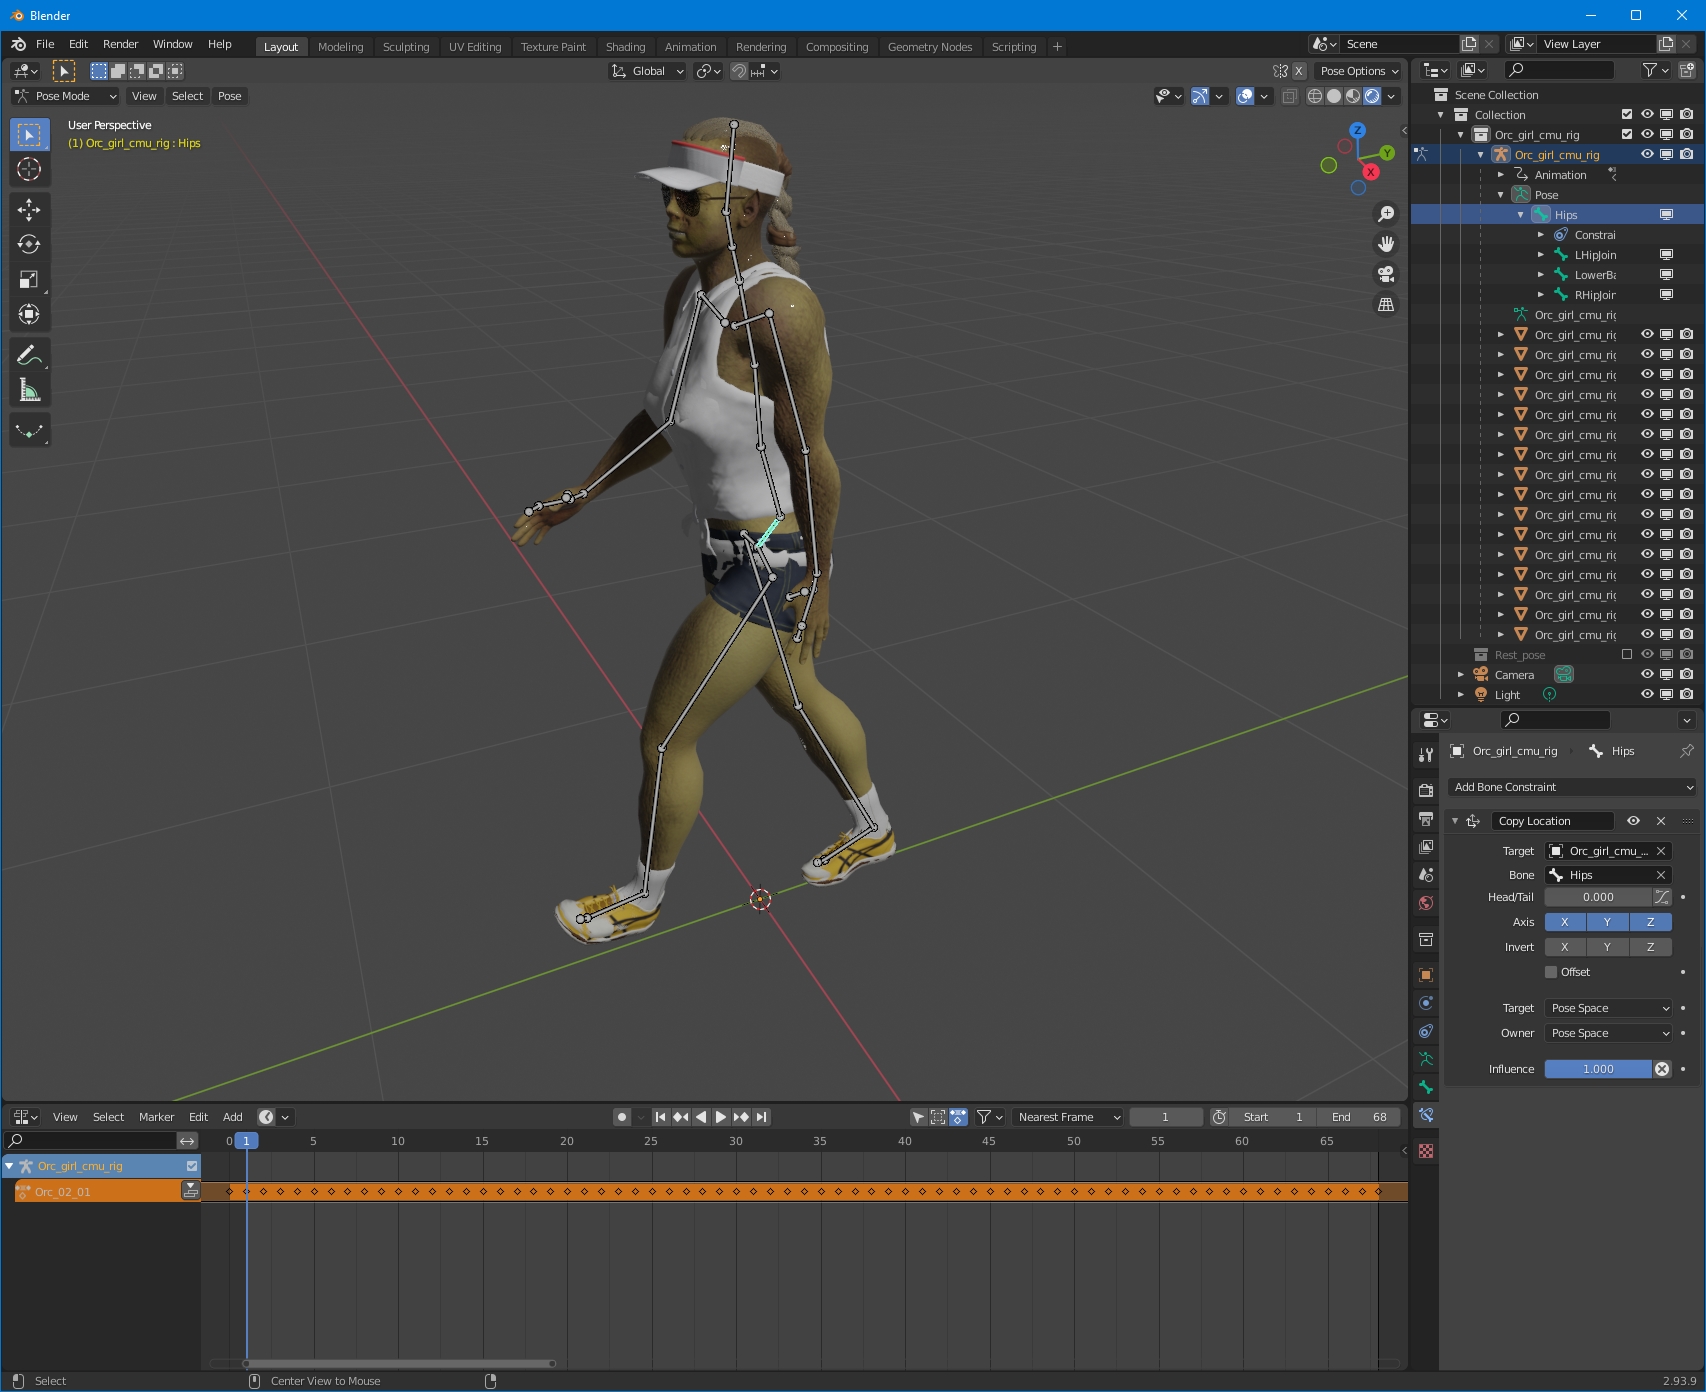
Step 3
Pose/Animate
Assign a rig
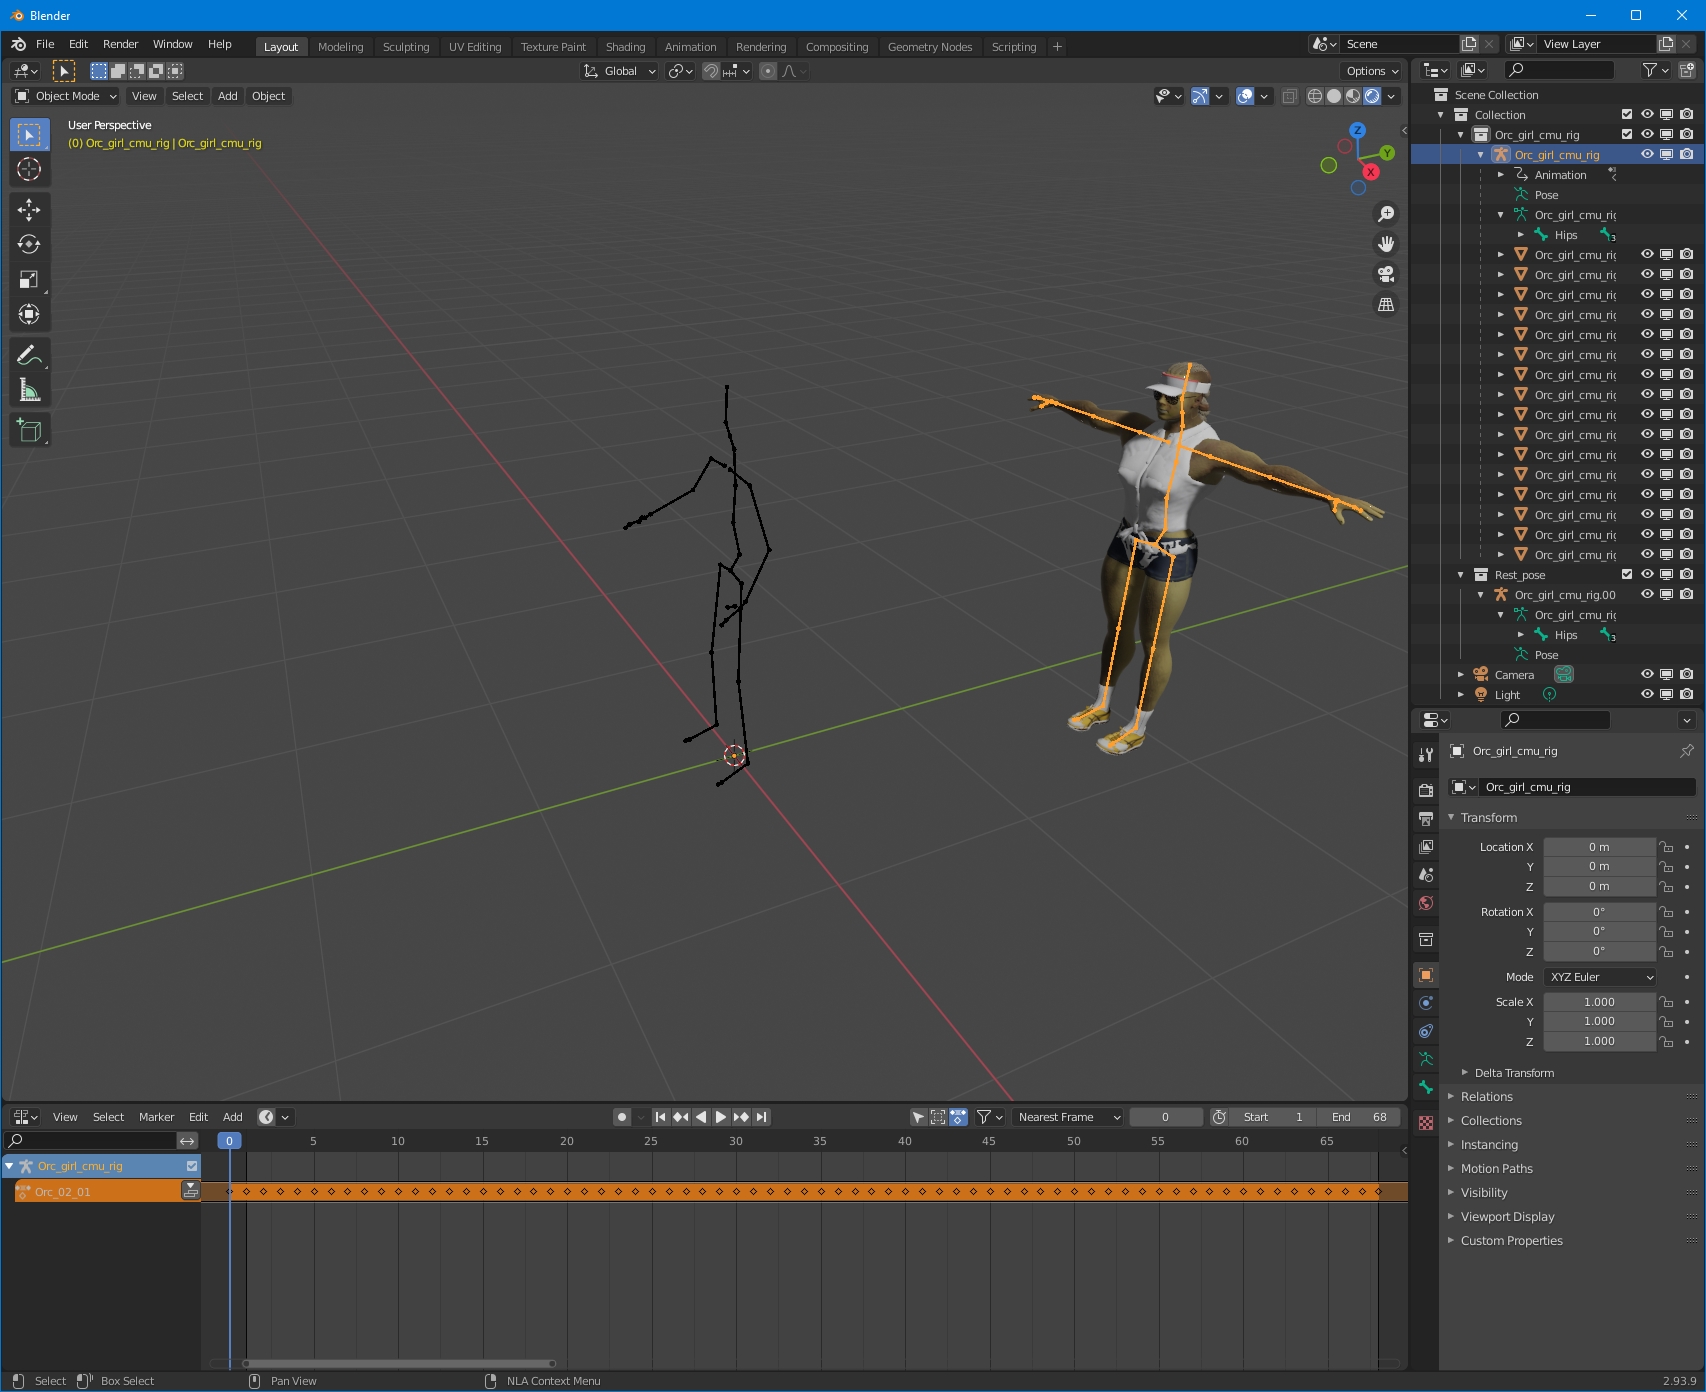
The rig should match the animation. For this example I use the CMU Motion Capture animation and assign the corresponding rig CMU mb.
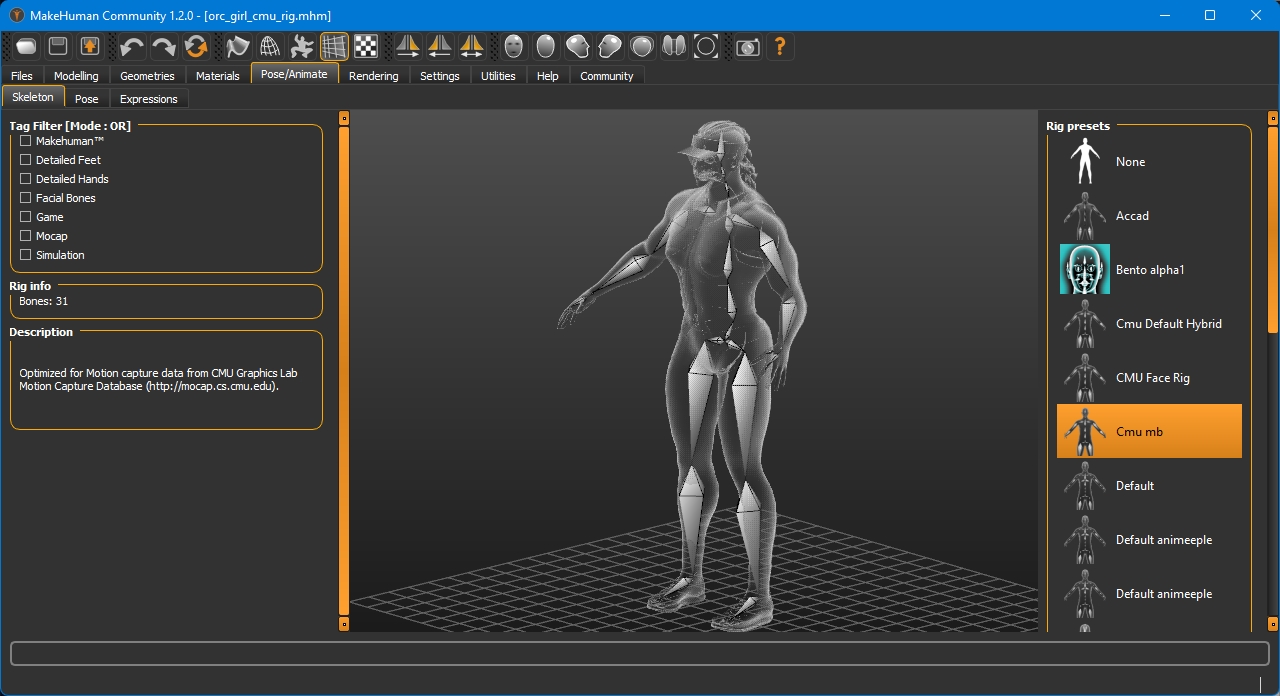
The character is ready for export.
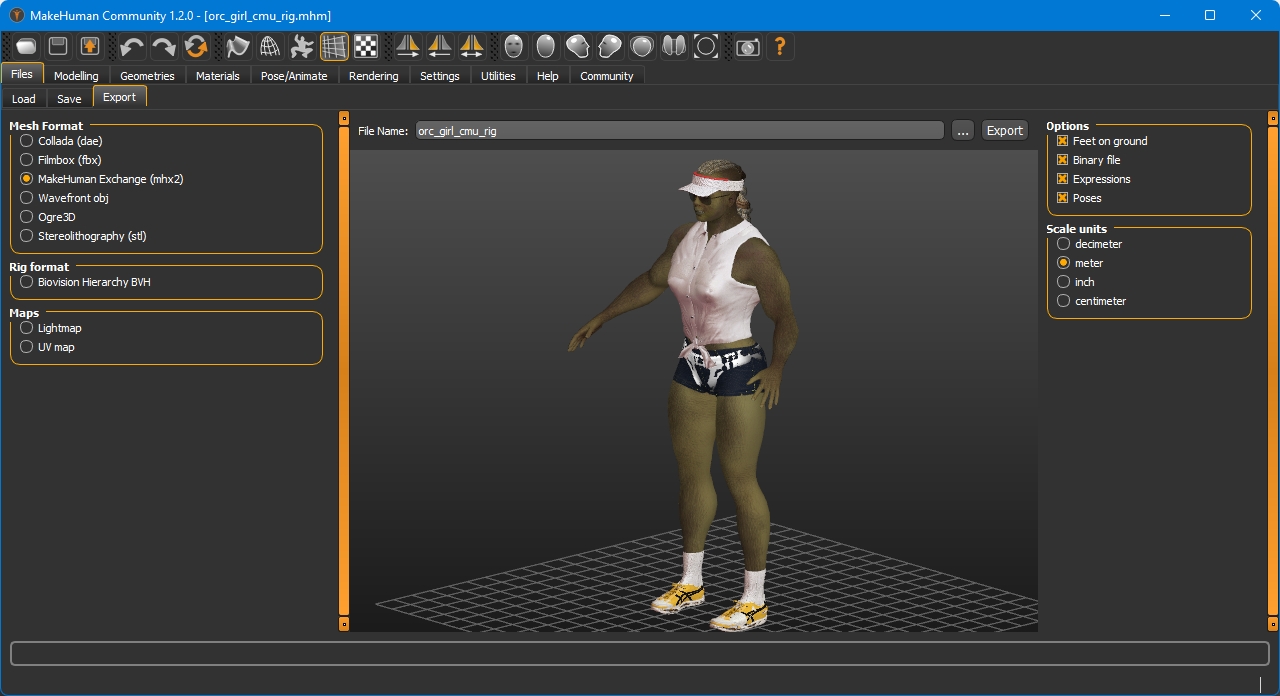
Step 4
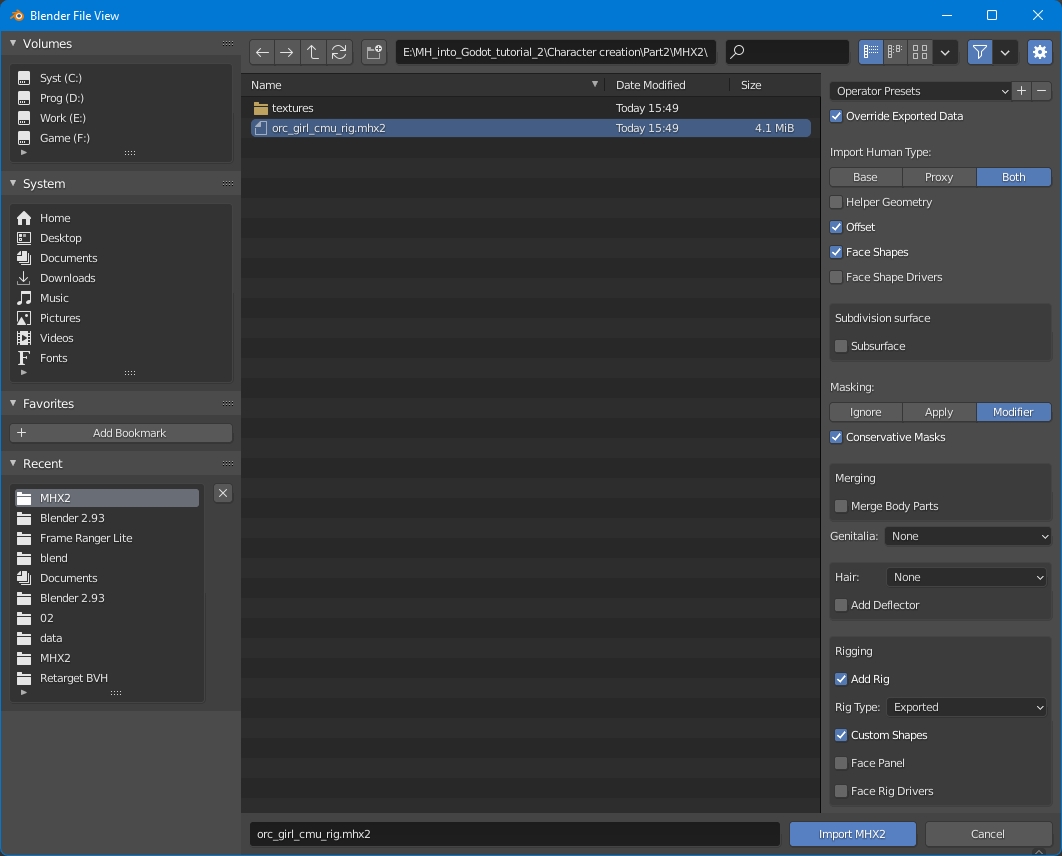
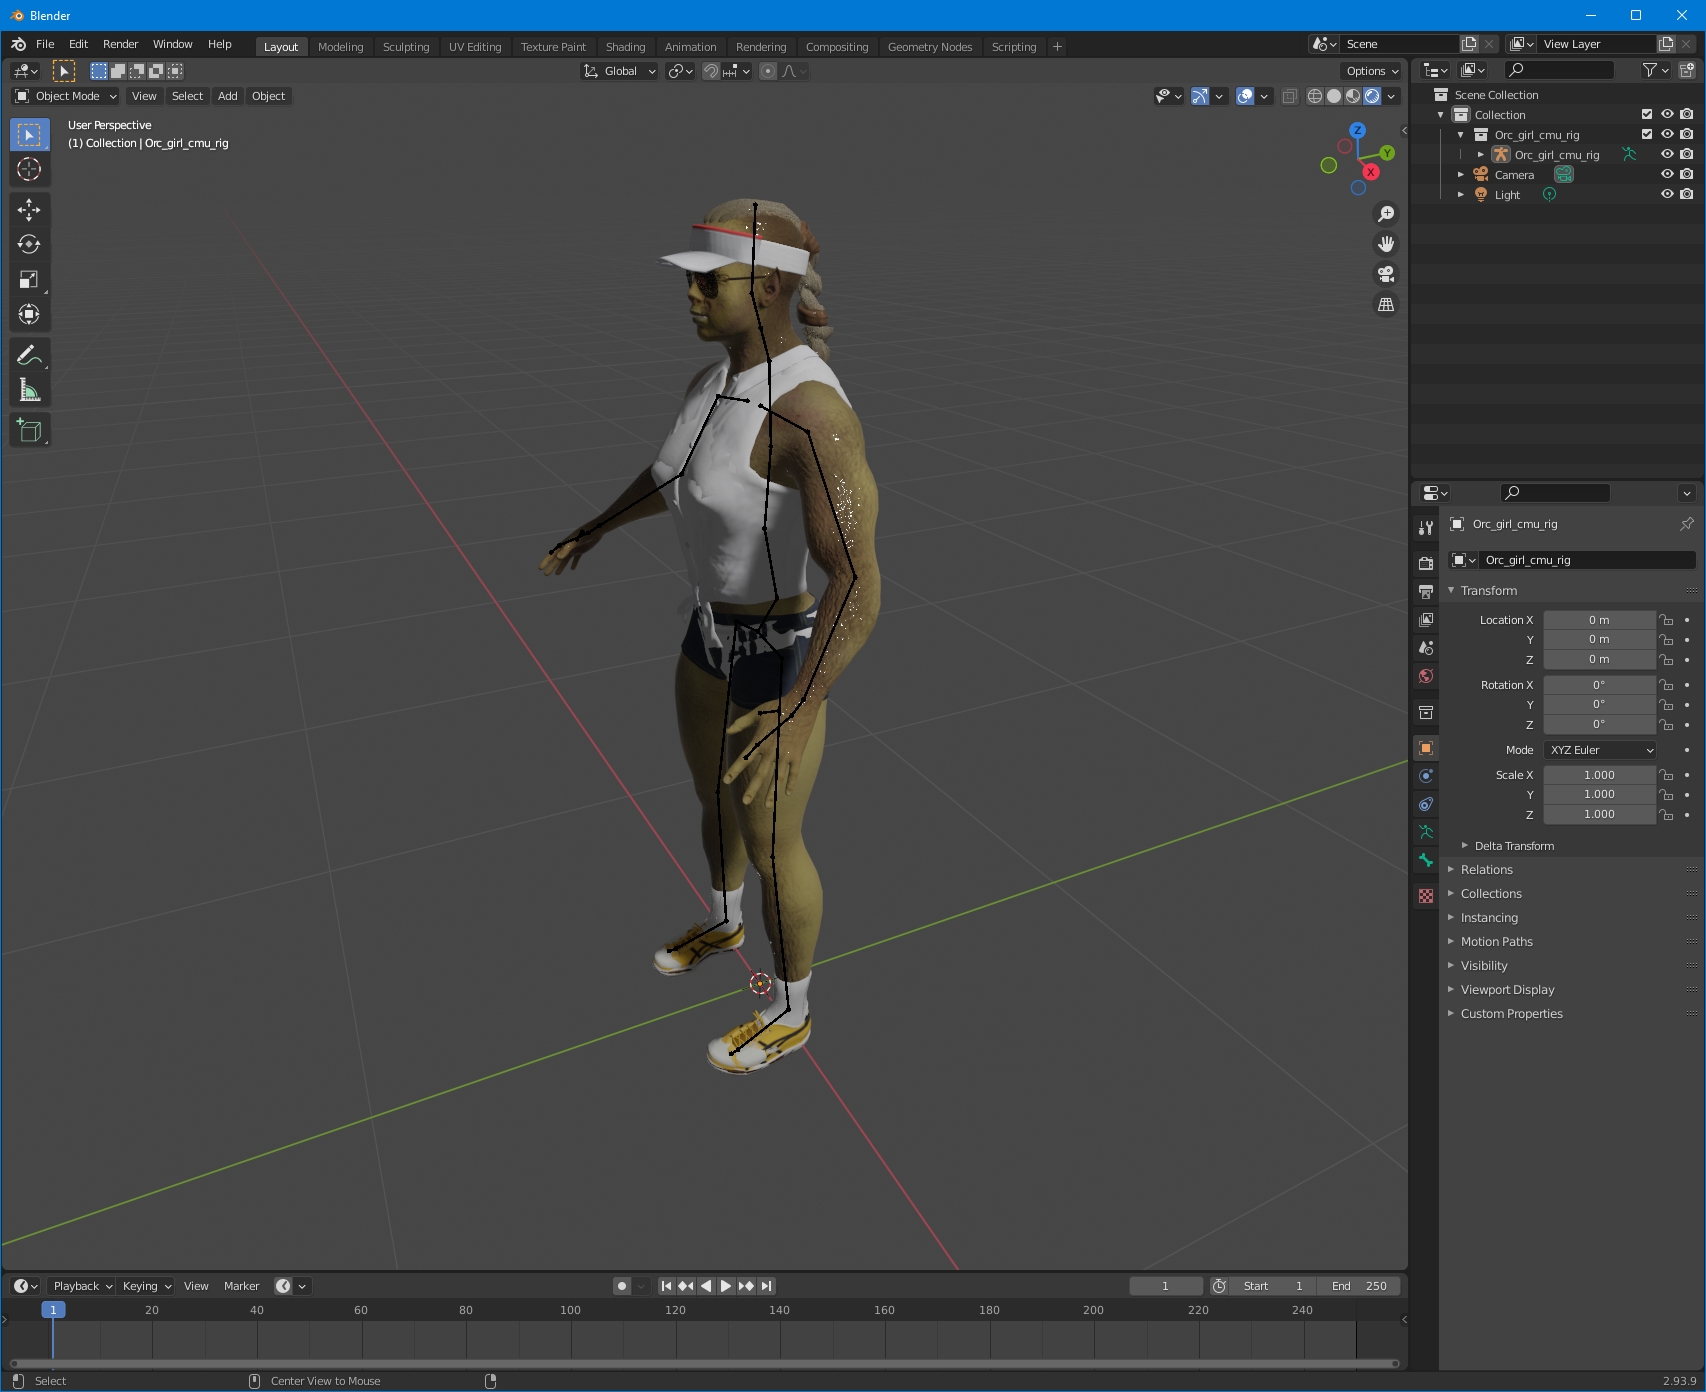
Export to Blender
You can put the character from MH into Blender in several ways.
The most reliable one is exporting to .mhx2 (MHX2 - MakeHuman eXchange format 2). This is the only way to correctly transfer the textures to the game engine.
If you use export to Blender via Socket (tab in MH "Community"), you will have to assign textures in the engine manually.
It is desirable not to forget to switch "Scale units" to a meter.
To be continued…
Funds
I'd like to try to raise finances to work on gamedev. I suppose, in addition to the engine site, also to put up on Patreon. Of course in completely free, but with an offer of donations. Considered an option with itch.io, but I could not find there section for tutorials. Are there any thoughts and suggestions on this topic, where else you can publish a tutorial?
Translated with http://www.DeepL.com/Translator (free version)